The Timesheet screen is an alternative to the Clockcard screen, and should only be used instead of the Clockcard. The Clockcard is used primarily for employees that will clock in and clock out when they are working.
The Timesheet screen is used for when it is necessary to record the hours an employee has worked, but not the times that they start and finish. The Clockcard screen uses ‘rules’ to calculate an employee’s hours, whereas the Timesheet screen requires totals to be entered manually into the fields. An example of the Timesheet vs. Clockcard scenario could be that in an organisation, employees who work in the building will Clock in and out, whilst employees who work offsite (sales reps) will enter hours/exceptions manually to the Timesheet.
You can access the Timesheet screen by clicking on the following icon.

You will now see the “Timesheet” screen.
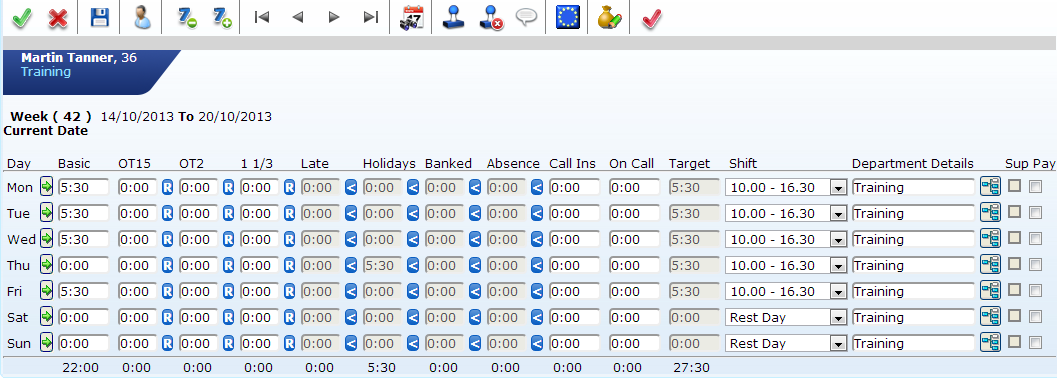
The Timesheet screen is simple to use, as it requires manual entry into the available fields. Some companies choose for employees to input all hours, including basic hours. Other companies choose for the basic column to be automatically populated based on the employees target hours for that day, the employee simply add any exceptions. For example Overtime, Absences etc

The amount of basic hours worked will be automated in the system. If not the employee entering their basic hours should enter the figure as a total.
There are many different types of totals that can be recorded on the Timesheet screen such as Basic, Overtime, Time in Lieu, Absences, Holidays, On Call and Lates/Earlies. It is also possible to record the shift that the employee worked by changing the shift from the shift dropdown list.
Once you have entered the totals of hours for an employee for the week, these hours can be authorised by the user, depending on the user’s privileges. By using the authorise/unauthorise stamp, or clicking in the Sup/Pay boxes, the user can authorise any hours recorded for the day/week
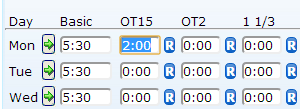
To enter hours, simply type in the amount of hours required into the field.
It is possible to enter reasons for Overtime in the Timesheet screen. When you enter the amount of hours for the Overtime, click on the “R” button next to the total to enter a reason:
You will now see the following window:
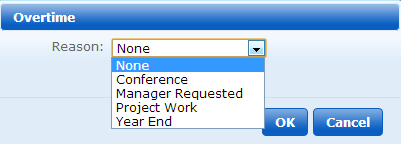
Select the reason for the Overtime from the dropdown list. You may also enter a comment if you wish. Click “Ok” to save the change, or “Cancel” to abandon.
Any Holidays that have already been entered into the system via the Absence Screen will be seen here. (As you can see for Thursday in the example below)
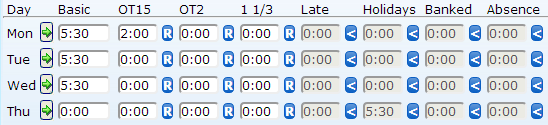
If the Holiday has not been entered, then you may have the ability to enter it from the Timesheet screen (this will depend on your company policy and profile type).
Like Lateness, you cannot type in manually the amount of holiday hours; you should click on the “arrow” button, which will bring you to the Absence screen.

Please revert to the absence section of the manual should you need to reference the Absence Screen.
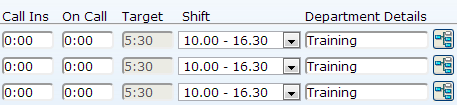
It is possible to change the department that an employee works in for a day if you have purchased Softworks “Departmental Clockings” module. You will know if you have this as there will be a field available for you to change the department, as seen below. If you do not have this, you will not be able to record which department the employee worked in for the day (defaults to home department). Contact your Account Manager if you would like further information about Departmental Clockings.
To change the department to employee worked in, click on the icon as seen above. You will then see a simple version of the company structure.
Click on the required department from the list, and click “Ok” to save the change, or “Cancel” to abandon the changes.
If an employee works in two different departments during the same day, you can split these hours to record them as worked for the separate departments. This requires the “Departmental Clockings” module.
Firstly, you must create a second line for the day so that you can enter two separate totals for the day in question. Click on the green arrow beside the relevant day, as you can see below, it has opened a second line for Monday, directly under the original line
![]()
You can now enter two separate amounts of hours for Monday, as two lines exist. You can also record these two lines as being worked in separate departments, by changing the department.
The “Comments” icon allows comments to be attributed to a specific day. Highlight the day you wish to enter a comment for, and then click on the comment icon

Once you click on the icon you will this screen.

Type the text into the appropriate text field for the day in question, and click on the blue disk to save.
The total amounts of hours worked per category are recorded at the bottom of the Timesheet screen, as seen in the example below.
