To find an employee, you may use either the Employee Cycle icons or the find an employee icon

If you use the “find an employee” icon, you will see a list of employees to select from. You may search by employee number, or by surname. When you have found the employee required, click ok.
It is possible to move back and forward through weekly timesheets by clicking on the plus/minus 7 days icons.

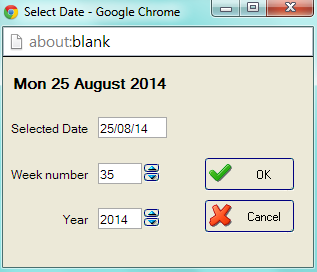
If you need to access a specific date, click on the “go to date” icon.

Now enter the date you require, and press OK
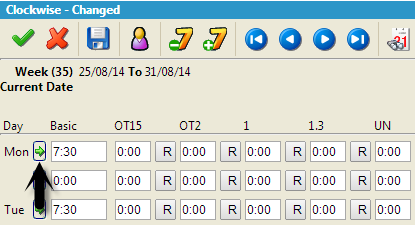
To enter hours, simply type in the amount of hours required into the field.
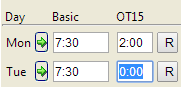
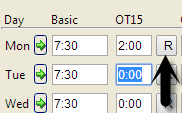
It is possible to enter reasons for Overtime in the Timesheet screen. When you enter the amount of hours for the Overtime, click on the “R” button next to the total to enter a reason:
You will now see the following window:
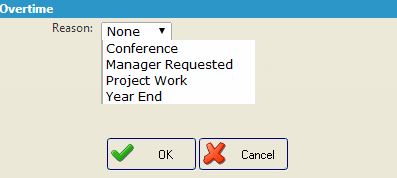
Select the reason for the Overtime from the dropdown list.
Any Holidays that have already been entered into the system via the Absence Screen will be seen here. If the Holiday has not been entered, then you may enter it from here. Like Lateness, you cannot type in manually the amount of holiday hours; you should click on the “arrow” button, which will bring you to the Absence screen.
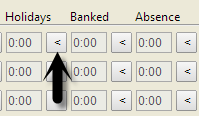
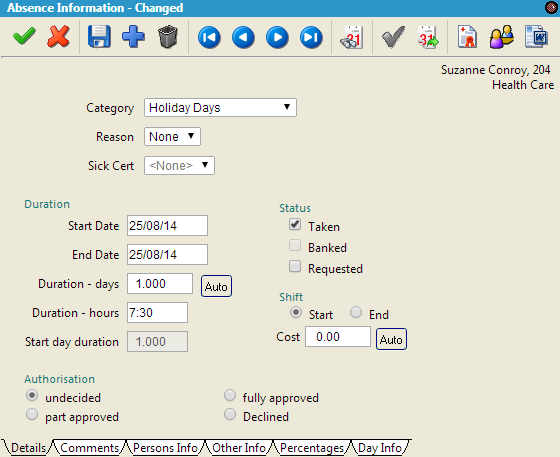
The Absence screen will now be seen, with a new instance of Holidays created for the employee and day in question. Complete the information as required and save the absence. For more information about Absences, please refer to the section of this manual titled Absences.
To enter an Absence, click on the “arrow” button in the “Absence” column as seen below.
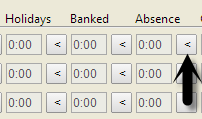
A new absence will be created on the “Absence” screen. Sickness will be selected by default, but you may select whichever absence category you require. For more information about Absences, please refer to the section of this manual titled Absences.
To enter Time in Lieu Earned, click on the “arrow” button in the “Banked” column as seen below. Please note this may not be applicable to all companies and the column may be titled Banked, Time in Lieu, TOIL earned etc
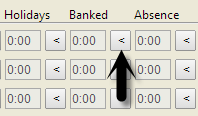
This will open the absence screen with a new instance of Time in Lieu Earned, where you can enter the amount of time manually. Save this absence, and this total will be seen on the Timesheet screen. For more information about Absences, please refer to the section of this manual titled Absences.
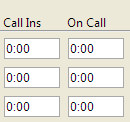
To enter hours as “On Call” or “Call In”, type in the amount of hours required manually. Again this option will only be visible for companies where On Call and/or Call In is applicable
It is possible to change the department that an employee works in for a day if you have purchased Softworks “Departmental Clockings” module. You will know if you have this as there will be a field available for you to change the department, as seen below. If you do not have this, you will not be able to record which department the employee worked in for the day (defaults to home department). Contact your Account Manager if you would like further information about Departmental Clockings.
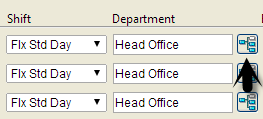
To change the department to employee worked in, click on the icon as seen above. You will then see a simple version of the company structure.
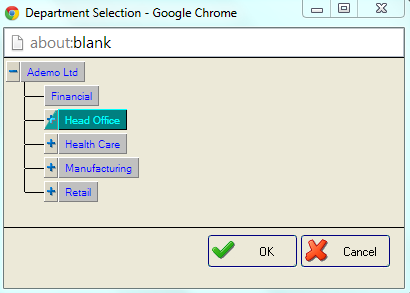
Click on the required department from the list, and click “Ok” to save the change, or “Cancel” to abandon the changes.
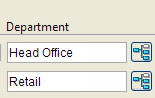
If an employee works in two different departments during the same day, you can split these hours to record them as worked for the separate departments. This requires the “Departmental Clockings” module. You will know if you have this as there will be a field available for you to change the department, as seen below. If you do not have this, you will not be able to record which department the employee worked in for the day (defaults to home department). Contact your Account Manager if you would like further information about Departmental Clockings.
Firstly, you must create a second line for the day so that you can enter two separate totals for the day in question. Click on the green arrow icon to the left of the relevant day you want to create an additional line for. As you can see in the example below, this opens a second blank line on Monday and pushes the line for Tuesday down.
You can now enter two separate amounts of hours for Monday, as two lines exist. You can also record these two lines as being worked in separate departments, by changing the department. Click on the “Change Department” icon as seen below.

You will then see a simple version of the company structure. Please follow the process as outline above in Changing Departments to record the hours against different departments.
The “Comments” icon allows comments to be attributed to a specific day. Highlight the day you wish to enter a comment for, and then click on the comment icon

Once you click on the icon you will this screen.
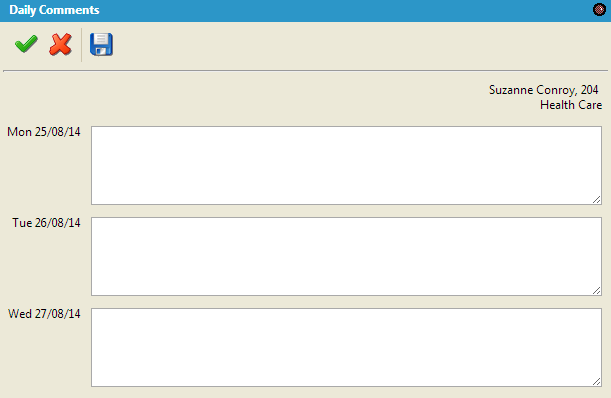
Type the text into the appropriate text field for the day in question, and click on the blue disk to save.
The total amounts of hours worked per category are recorded at the bottom of the Timesheet screen, as seen in the example below.
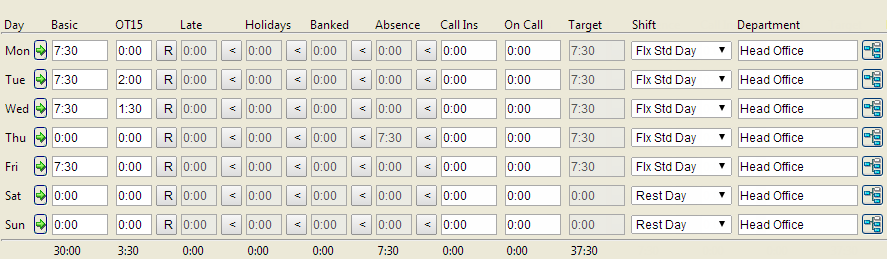
These totals are the total of all the entries in the column for the category, as seen with Basic. Basic has a total of 30 hours for the week. There are 3 hours and 30 minutes recorded as Overtime (OT15) and also an absence for 7 hours 30.
Authorising/Approving Hours
There is the functionality to approve hours on the Timesheet Screen. This may be a process that ensures the Employee authorises their information once they have finished updating the details. Alternatively, It may be a case that the Supervisor/Manager may use this screen also to authorise each employee's hours seperately.
Please note, a Supervisor/Manager will have the ability to view all their employee's details in a summary format and can approve the summarised hours also. This is done in the Summary Timesheet Screen. Please see the Summary Timesheet section of the manual for more details.
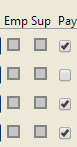
On the Timesheet Screen, there are check-boxes to the right hand side of the screen;
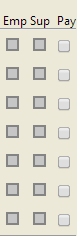
Each check-box comes under the column Emp, Sup and Pay. The three options relate to Employee, Supervisor and Payroll.
If you have logged in as an Employee, the check-boxes under 'Emp' will be open and available for selection. Similarly if you have logged in as Supervisor or Manager, only the check-boxes beneath 'Sup' will be available. 'Pay' relates to Payroll or alternatively the highest level of access.
To authorise particular days, simply select the relevant check-boxes;
Alternatively, in the main toolbar, there is the option to Authorise the full week

Alternatively, should you need to, you can Un-Authorise the week also

Please note, once your Timesheet has been approved by the level above you, you will not be able to make changes without asking for the day to be un-authorised first.
For example, if an employee authorises Monday and their Supervisor/Manager then authorises Monday at 'Sup' level, the employee will not be able to go in and add Overtime for the Monday, without asking their Supervisor/Manager to un-authorise the day first.
European Working Time Directive Screen
Should you wish to view the Timesheet information in relation to the European Working Time Directive, click on the following icon in the toolbar;

Please note, if you are outside of Europe or if your company policy is to opt out of the WTD, this functionality will not be applicable and will most likely be turned off in your system.
To find out more information on the Working Time Directive Data Entry Screen, please see the Working Time Directive section in the manual.
View Authorisations
Should you wish to view authorisation details, click on the following icon;

This will open a screen allowing you to see who authorised the hours at Employee, Supervisor and Payroll level
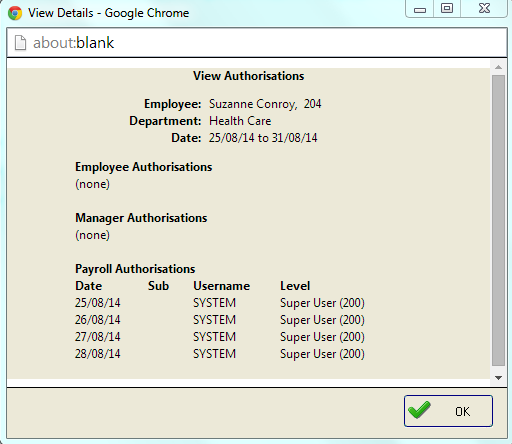
In the example above, the hours have only been approved at Payroll level
The options that appear for Overtime Reasons, Late Reasons and Late Actions are fully editable by the user, in the Softworks Configuration Utility. These are all edited under the “Define Picklists” Section which is located under the “System” menu bar option. Should you need to add options please talk to your System Administrator.