The first step in the absence screen is to select the employee who you wish to work with. Unlike other screens, the cycle buttons move through absences here rather than employees.
Click on the “Find Employee” icon

Search for the employee and select as required.
You will now see the most recent absence entry for the employee that is selected.
When the employee that is required has been selected, you may view all the employees absences at once, by clicking on the “Go to date” icon

You will now see a screen like this:

This is a list of the absences for the employee, and it shows absences stretching as long back as the system has been used in your organisation.
You can also view previous absences by selecting the cycle icons on the absence screen:

Using the blue cycle icons moves quickly through the previous absences, however if there are a lot of absences in the system, it may take some time to find the absence required. In this instance it is better to use the “go to date” icon.
To add a new absence, firstly select the employee concerned. Next, click on the “blue plus” icon. You will now see a new absence window. You will know that this is a new absence because it reads “Changed” in the blue bar at the top of the window, and the absence will take today’s date.
N.B: Some versions of Softworks automatically create a new absence for you when you open the absence screen.

You must give the new absence a category, a duration, and an authorisation level before saving the absence. Remember, the choice of category gives different options regarding the reason code, and that both the start and end dates are inclusive. The absence should be given the correct authorisation level, and then saved by clicking on the blue “save disk” icon.
It is possible to add a partial absence by setting the duration in days/hours to the amount of time needed for the absence. If it is a half day, enter 0.5 days, if it is 2 hours, enter 2 hours
It is possible to edit an existing absence, depending on the circumstances. An absence is normally authorised by a Softworks user, so the authorisation may block you from editing an absence if you are not either the original user who entered the absence, or a user with higher power than the user who entered the absence.
You can only change the length of an absence once it has been saved in Softworks. If you wish to change the category of the absence, then you need to delete the absence and create a new absence.
Find the absence that you wish to edit by selecting the employee and using the “go to date” icon to select an absence from the list.
To edit the absence, set the authorisation status to “undecided”. Now you can change the dates of the absence. Set the status to “fully authorised” again, and save the absence.
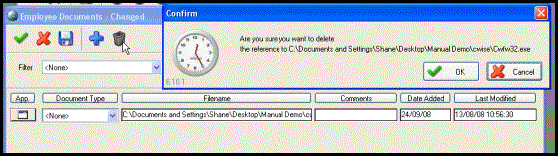
Once you have selected the absence that you wish to delete, click on the “delete” icon

You will be asked to confirm this action
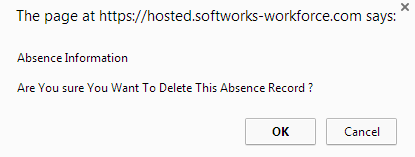
Select “yes” to delete the record.
It is possible to extend an absence without changing the authorisation status of the absence. This is useful if an employee is entered on sick leave for a time, but the length of the absence is not known at the time of absence entry. The absence can therefore be extended to meet the real length of the absence by using the “extend absence” icon.
Find the employee and the absence that you wish to extend. Then click on the “extend absence” icon, as seen below. Each time you click on this icon it will extend the absence by one working day according to their roster.

Save the changes by using the blue “save disk” icon when you are finished.
To view existing Return to Work interviews, inside the absence entry window, find the absence that you wish to view the interview for firstly. Then click on the “return to work interview” icon

You will now see the Return to Work interview window. You may use the “go to date” icon or the blue “cycle” buttons to move between existing return to work interviews.
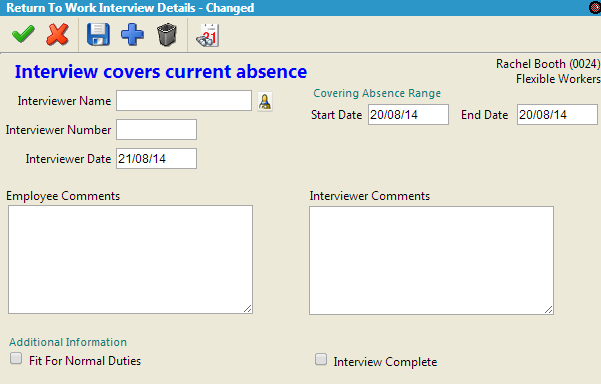
Once you are finished, click on the “green tick” icon to exit and save.
When an absence is saved, the user entering the absence should set the authorisation status. If it is approved then it should be “fully approved”, if it is not approved then it should be “disapproved”. If the status has been changed from “undecided” then the user who changed that will be recorded, like a signature.
To view the authorisation for an absence, first find the absence you wish to view, and then click on the red tick “view authorisation” icon
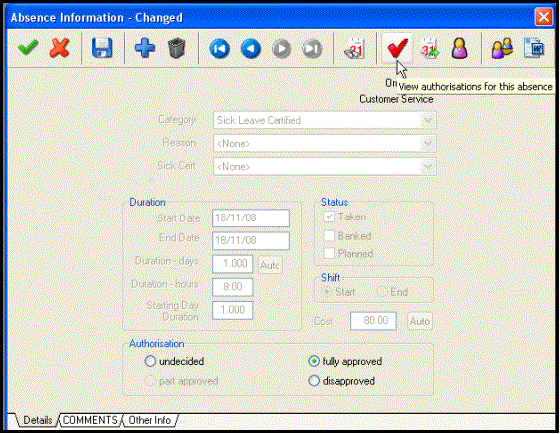
You will now see the following window
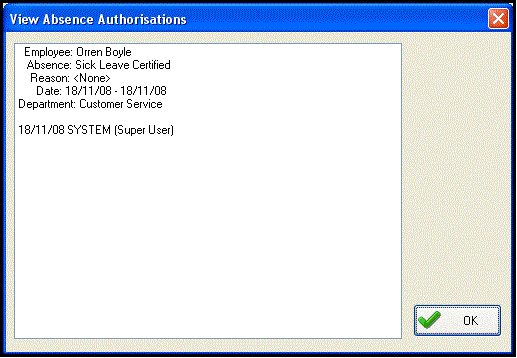
Here it can be seen that the user “System” authorised the absence. Click “ok” to finish in this screen
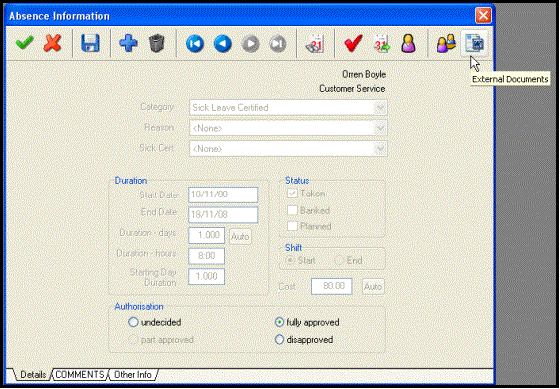
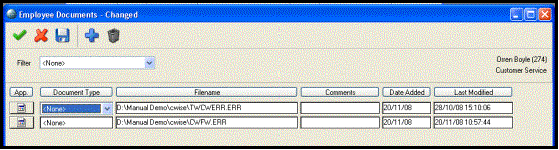
A sick certificate can be linked to an absence, by clicking on the “external documents” icon in the absence screen.
Click on the external documents icon for the employee in question
You will now see a window like this:
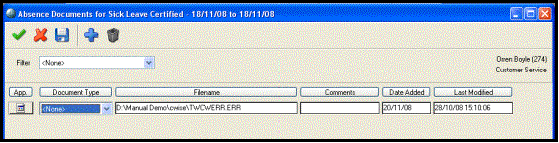
Existing Sick Certificates are listed for the employee in question.
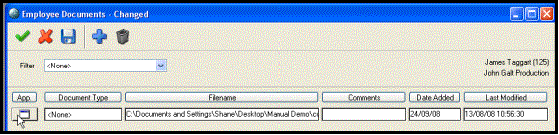
Click on the blue plus icon. This will open a standard windows window, where you can select the document you wish to link.
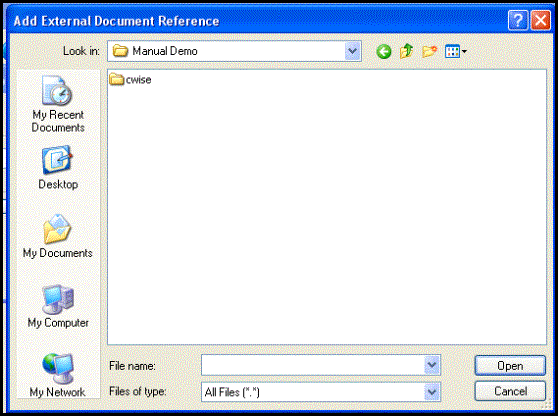
Navigate to the document you wish to link and click “open”.
click on the symbol to the left of the document info.
Highlight the document in question and click on the bin icon