The absence screen is accessed by clicking on the Absence Entry icon on the main Softworks screen. This icon is represented by a yellow car:

When you have opened the absence screen, you should see this screen:
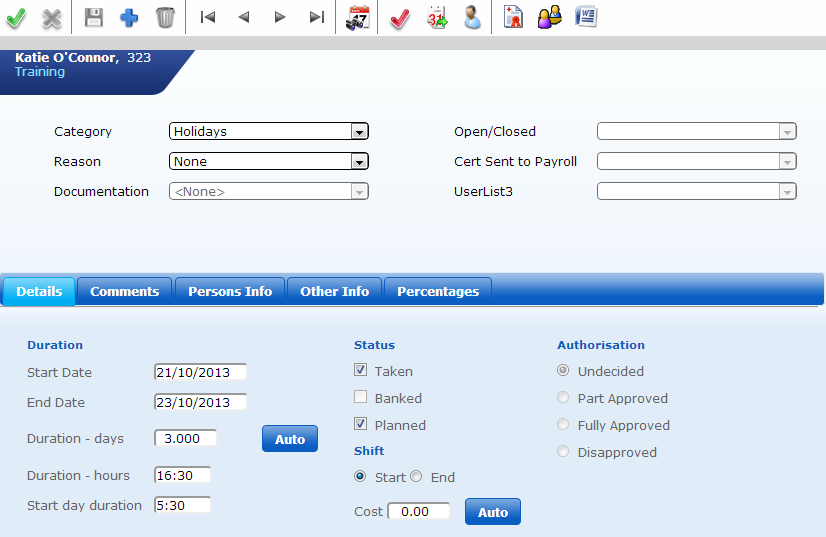
This is the main Absence Entry screen, where absences can be created, viewed, and edited.
Absences are stored and created in the absence screen. There are three tabs in the absence screen, however in most cases only the first tab “Details” will be used.
To select an absence category, click on the category drop down list and select the option required. Depending on your organisation requirements, more or less information may be required when entering an absence. For instance, if an absence of the category “Holidays” has been entered, normally it is not required to have a reason to go on holiday, as seen in the image above. However, if the absence is for “sickness”, then a reason may be required, and even a sick cert, as seen in the image below:
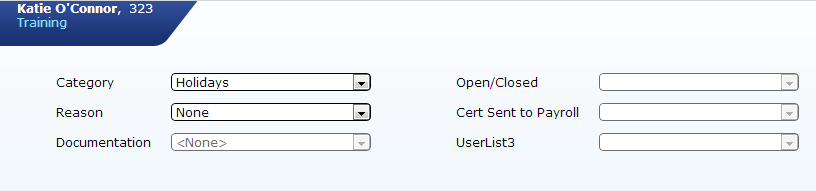
The absence categories that can be selected can be added by a superuser in the Softworks Configuration Utility, along with the reasons for the absence and sick cert status.
When a new absence is entered, a default category is selected, usually this is set to “Holidays”.
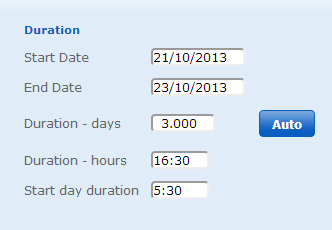
To set the duration of an absence, click on the drop down calendar for the Start Date and the End Date. You may also type in the dates manually into the Start/End Date fields.
An absence must have a fixed duration or length of time. Even if the absence end date is not known when it is entered, date parameters must be set. A start date and an end date must be selected, and these dates are both inclusive in the absence. For example, in the absence entry seen in the image above, it is from 21st of October until the 23rd of October. This will cover the date’s 21st/ 22nd/ 23rd
Once the start and end dates have been entered, a duration in days and hours will be seen. If this is not refreshed automatically, click on the “Auto” button. This length of time is automatically calculated according to the roster that the employee is working. It calculates working days and hours according to what they are rostered to work during those days.
N.B – In some cases it may not be possible to predict how many working days/hours an employee will miss in advance, as this is not know at this time. In these circumstances, absences are normally entered in on a daily basis.
It is possible to enter manually the amount of days or hours that are required into the days/hours field, however this will only work with a one-day absence. For example, if an employee is absent for half a day, 0.5 days may be entered into the days field.
The Starting Day Duration field allows for more complex absence settings, and caters for the first day of the absence not being a full day.
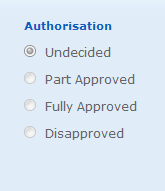
To set the authorisation status for an absence, click on the required authorisation level.
All absences entered into Softworks will have an authorisation status. Some organisations choose not to change the status of the Authorisation from “undecided” as it is not seen as necessary. It is recommended that absences are given the correct authorisation status as it the “view authorisations” icon will become active, and it can be seen which user authorised the absence.
Depending on how your organisation works, you may be required to use different settings here
If employees enter their own absences into Softworks, they will not be able to set the authorisation status. This will be activated by a supervisor, who will set the absence to either “Fully Approved” or “Disapproved”.
If the supervisor adds absences into Softworks, then nearly all absences should be recorded as “Fully Approved”. The reason for this is that most absence requests that are denied, do not make it as far as the Softworks system and are denied by the supervisor.
The status of the absence is also listed on the absence screen. There are three possible settings here:
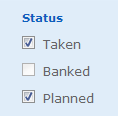
Taken: This means that the absence in question is official and will be deducted from a balance if required. For example, if a holiday is set to “taken”, it will then be deducted from the employees holiday balance
Banked: this only applies to absence entries that increase a balance. For example, Time in Lieu Earned is recorded in Softworks as an absence, and an hours entered under this category are considered as “banked” as they increase the balance
Planned: this means the absence is planned and will not deduct from the balance of the employee. This is used in organisations that allow employees to enter absences themselves, and usually the supervisor authorises these, which changes their status to “taken”.
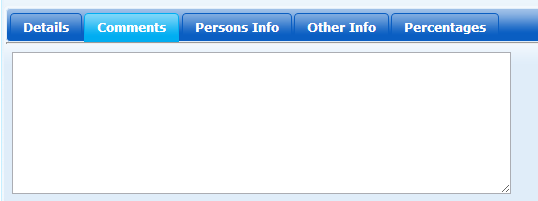
It is possible to enter comments manually for an absence. Clicking on the “Comments” tab on the absence screen shows a window where comments may be entered:
The first step in the absence screen is to select the employee who you wish to work with. Unlike other screens, the cycle buttons move through absences here rather than employees.
Click on the “Find Employee” icon

Select the employee that you wish to work with and click “ok”.
You will now see the most recent absence entry for the employee that is selected.
When the employee that is required has been selected, you may view all the employee’s absences at once, by clicking on the “Go to date” icon

You will now see a screen like this:
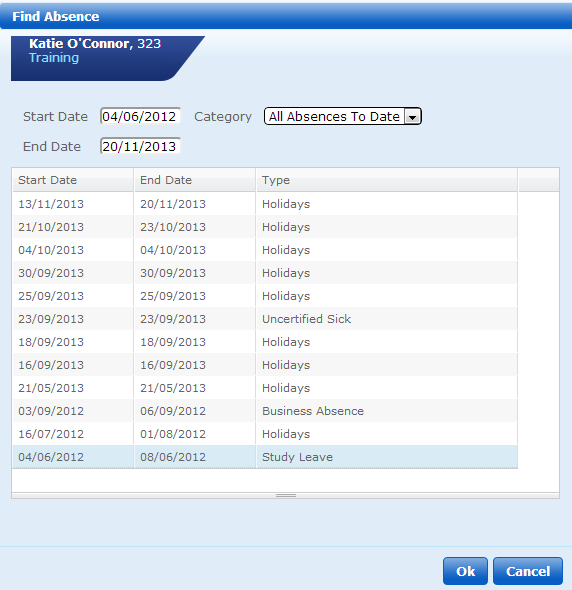
This is a list of the absences for the employee, and it shows absences stretching as long back as the system has been used in your organisation. However you can set a specific date range in the relevant fields if required.
If you wish to see the details of a specific absence, select the absence from the list and click OK. It will open this absence in the main screen.
It is possible to view existing absences in two ways. The first is to use the “go to date” icon as outlined above.
The second way is to use the cycle icons on the absence screen:

Using the blue cycle icons moves quickly through the previous absences, however if there are a lot of absences in the system, it may take some time to find the absence required. In this instance it is better to use the “go to date” icon.
To add a new absence, firstly select the employee concerned. Next, click on the “blue plus” icon. You will now see a new absence window.

The new absence that opens in the system will default to the current date.
You must give the new absence a category, a duration, and if you are required, an authorisation level before saving the absence.
Remember, the choice of category gives different options regarding the reason code, and that both the start and end dates are inclusive.
If you have the relevant authority to Approve or Disapprove absence, do so before saving the absence via the “save disk” icon.
It is possible to add a partial absence by setting the duration in days/hours to the amount of time needed for the absence. If it is a half day, enter 0.5 days, if it is 2 hours, enter 2 hours
It is possible to edit an existing absence, depending on the circumstances. An absence is normally authorised by a Softworks user, so the authorisation may block you from editing an absence if you are not either the original user who entered the absence, or a user with higher power than the user who entered the absence.
You can only change the length of an absence once it has been saved in Softworks. If you wish to change the category of the absence, then you need to delete the absence and create a new absence.
Find the absence that you wish to edit by selecting the employee and using the “go to date” icon to select an absence from the list.
To edit the absence, set the authorisation status to “undecided”. Now you can change the dates of the absence. Set the status to “fully authorised” again, and save the absence.
If you wish to delete an absence from the system. Select the relevant employee and relevant absence. You may need to change the status to Undecided if it has already been approved. Once you have done this, click on the “delete” icon

You will be asked to confirm this action. Select “yes” to delete the record.
It is possible to extend an absence without changing the authorisation status of the absence. This is useful if an employee is entered on sick leave for a time, but the length of the absence is not known at the time of absence entry. The absence can therefore be extended to meet the real length of the absence by using the “extend absence” icon.
Find the employee and the absence that you wish to extend. Then click on the “extend absence” icon, as seen below. Each time you click on this icon it will extend the absence by one working day according to their roster.

Save the changes by using the blue “save disk” icon when you are finished.
When an absence is saved, the user entering the absence should set the authorisation status. If it is approved then it should be “fully approved”, if it is not approved then it should be “disapproved”. If the status has been changed from “undecided” then the user who changed that will be recorded, like a signature.
To view the authorisation for an absence, first find the absence you wish to view, and then click on the red tick “view authorisation” icon
