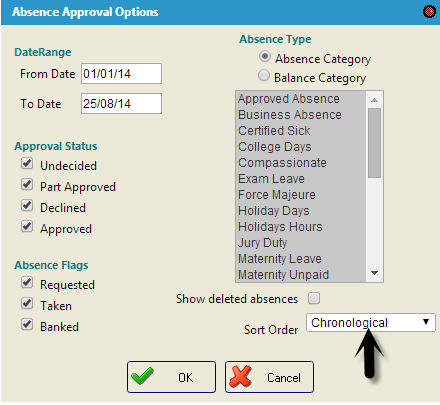
It is possible to edit the absences that are on show by using the options icon on the toolbar, seen in the image below:
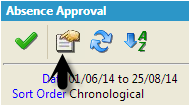
Click on this option and you will now see the following screen:
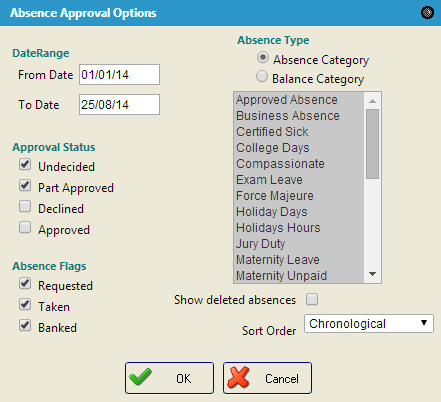
The following criteria may be selected for viewing absence:
Date Range: Select the start date and end date for the range. If you would like to view for the future, leave the End date blank.
Approval Status: There are four different approval statuses, Undecided, Part Approved, Disapproved, and Approved. You may select one or multiple statuses.
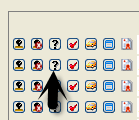
Once the criteria have been set for the absences you wish to view, you may approve the absences using the following icon to the left of the relevant absence

The Approval status will then change to a tick

To disapprove an absence, click on the disapprove icon as seen below.

The absence will then show a cross under the approval status

Setting an Absence Request to Undecided
To set an absence request to undecided, click on the "Question Mark" icon as below.
View Authorisations
If an absence has been approved/disapproved/part approved by a user, then you may check which user authorised it in the Absence Approval screen. Highlight the absence you wish to check, and then click on the “View Authorisations” icon as seen below:

You will now see the following screen, detailing the Authorisation information:

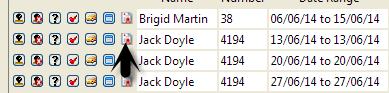
The absence information that is shown on the approval screen is a summarised version of what exists on the Absence screen. To view the actual absence information, double click on the absence

This will take you to that instance of the absence in the absence screen. You may return to the Absence Approval screen when you are finished by clicking on the Green Tick/Red Cross.
Access the Clockcard/Timesheet
You may wish to enter an employees clockcard or timesheet from the Absence Approval screen, you can do this with the following icon

Adding/Accessing Absence Cert Details
To add or access the absence cert details, click on the following icon;
This will open the following screen,
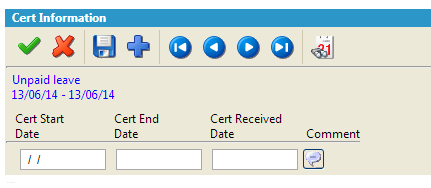
Update the details as required.
The Absence Approval screen displays totals for the amount of days and hours of the absences viewed on screen. These are seen as standard at the bottom of the Absence Approval screen, under the appropriate column:
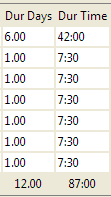
These totals are calculated for the absences displayed, so changing the absences displayed will change the totals.
It is possible to sort the on-screen absence according to whichever column seen on the screen. For instance, you may wish to sort by date order, or by status, or by category. Setting the sort order is also done in Options.
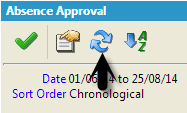
Refreshing Absences
It is possible to reload, or refresh, the absences that are shown on screen. To do this, click on the Reload Absence icon as seen below: